

LaravelとReactで作るSPAアプリ第4段です。
今度はReactでカレンダー上にスケジュールを表示していきましょう。
Laravel×ReactでつくるSPAスケジュールアプリ【④スケジュール表示】
データベースに接続、登録しよう
今回作成するスケジュールの完成形は以下の通りです。
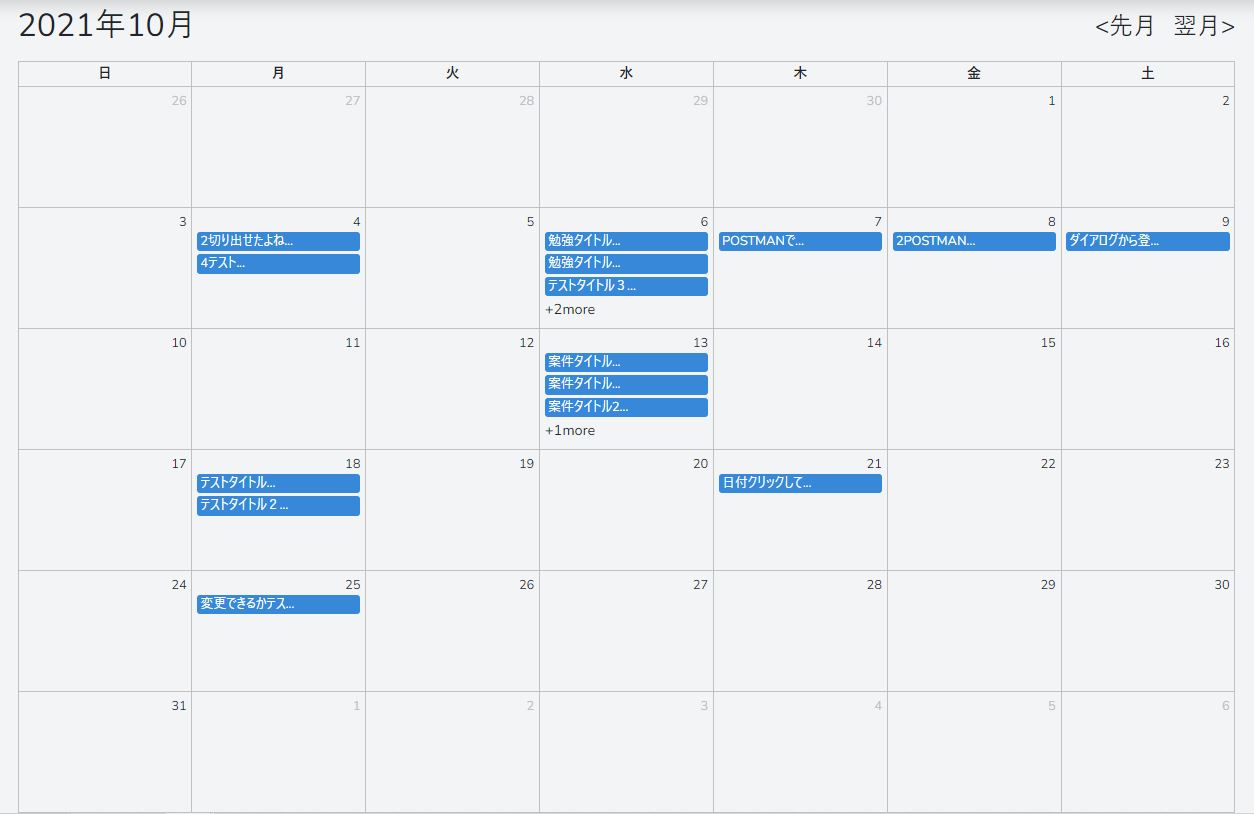
カレンダーの上にスケジュールを表示しています。
前回の記事でカレンダーの構築は出来ているので、スケジュールのみを表示しましょう。
その準備段階として、まずはデータベースに接続します。
データベースに接続するための情報はdocker_desktopで確認できます。
デスクトップにあるdocker_desktopをダブルクリックしてアプリを立ち上げます。
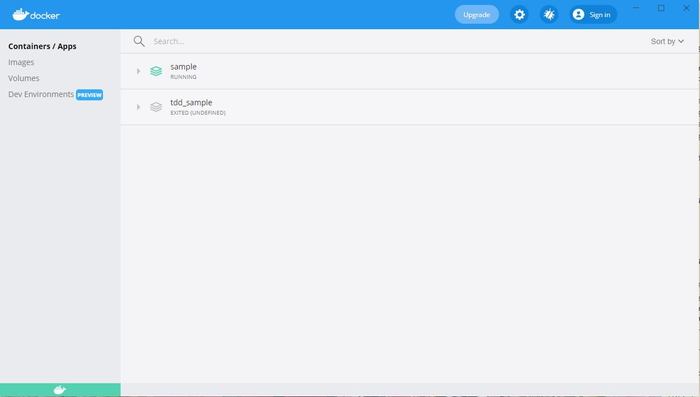
「Running」になっているコンテナがあると思うのでその行をクリック。
出てきた「コンテナ名_mysql_1」をクリックしましょう。
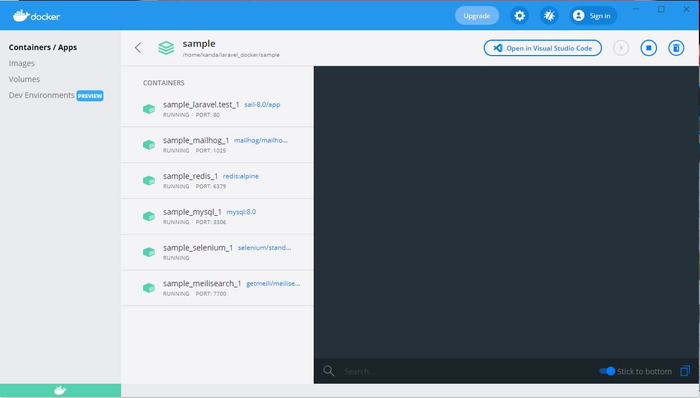
上のタブで表示を「INSPECT」に切り替えてください。
ここにある情報を用いて、データベースにログインできます。

さて、この情報は一旦控えておき、Laravelの機能を用いてスケジュール専用のテーブルを作成しましょう。
まずはマイグレーションファイルを作成します。
Windows Power Shellに以下を入力
|
1 |
$ sail php artisan make:migration create_schedules_table --create=schedules |
「database/migrations」のディレクトリに「create_schedules」のphpファイルが自動生成されます。
そちらを開いて、中を編集します。
|
1 2 3 4 5 6 7 8 9 10 11 |
public function up() { Schema::create('schedules', function (Blueprint $table) { $table->id(); $table->date('sch_date'); $table->time('sch_time'); $table->string('sch_category'); $table->string('sch_contents'); $table->timestamps(); }); } |
これで、データベースのカラムの設定ができたので、マイグレーションを実行します。
|
1 2 3 |
$ sail php artisan migrate Migrating: 2022_01_05_105322_create_schedules_table Migrated: 2022_01_05_105322_create_schedules_table (20.30ms) |
先程のデータベース情報を用いてデータベースにアクセスしてみましょう。
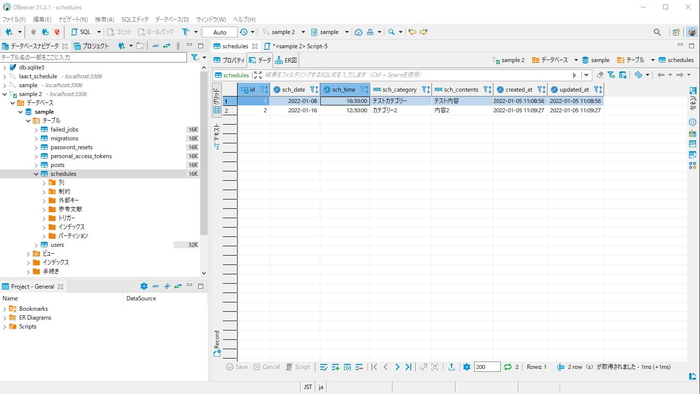
今回は無料のデータベースツールであるDBeaverを使用しました。
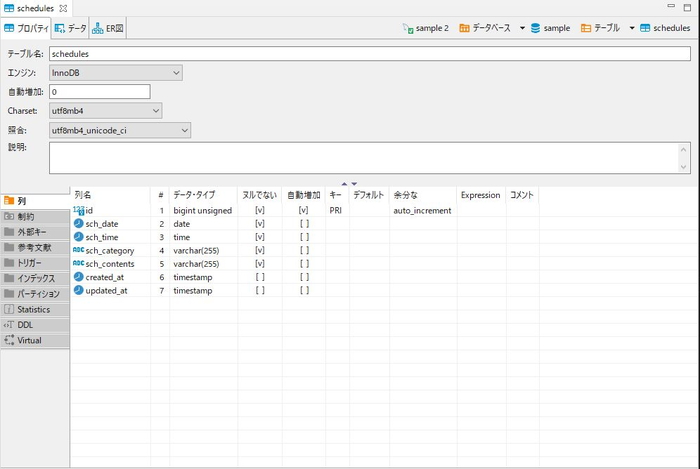
きちんとテーブルが作られていることが確認できますね。
次に表示用にデータを投入しましょう。
今回はあくまでも表示することがメインなので、2件程度データを投入しておけば良いでしょう。
それでは次のステップでこの2件のスケジュールを表示させてみましょう。
スケジュールを取得しよう!
表示をする前に、データベースからデータを取得する処理をLaravelで記載します。
表示はReactで、次のステップですね。
Laravelでデータを取得するために、データ取得コントローラーを作成します。
まずはモデルから、モデルの作成は以下のコマンドで一発で作成できます。
Windows Power Shellに入力してください。
|
1 2 |
$ sail php artisan make:model Schedule Model created successfully. |
上記のようにsuccessfullyという文言が出てくればおkです。
作成したファイルの中身は弄りませんが、「app/Models」配下にモデルファイルがあるのは確認しておいてください。
続いてコントローラーを作成します。こちらもコマンドで作成。
|
1 2 |
$ sail php artisan make:controller Api/ScheduleController Controller created successfully. |
上記コマンドを打つと「app/Http/Controllers/Api」配下にコントローラーファイルが作成されます。
それを開いて中身を編集しましょう。
以下のように、データベースのデータを取得するようにします。
|
1 2 3 4 5 6 7 8 9 10 |
use App\Http\Controllers\Controller; use Illuminate\Http\Request; use App\Models\Schedule; class ScheduleController extends Controller { public function scheduleindex(Request $request){ $schedules = Schedule::all(); return response()->json($schedules); } } |
編集するファイルは「routes/api.php」です。
|
1 2 3 4 |
// 追加 Route::group(['middleware'=>'api'],function(){ Route::post('posts','App\Http\Controllers\Api\ScheduleController@scheduleindex'); }); |
これでURLの末尾にpostsを付与すると、データが取得できるようになりました。
きちんとデータが取れるかどうかを、Postmanで確認してみましょう。
URLは「http://localhost/api/posts」です。
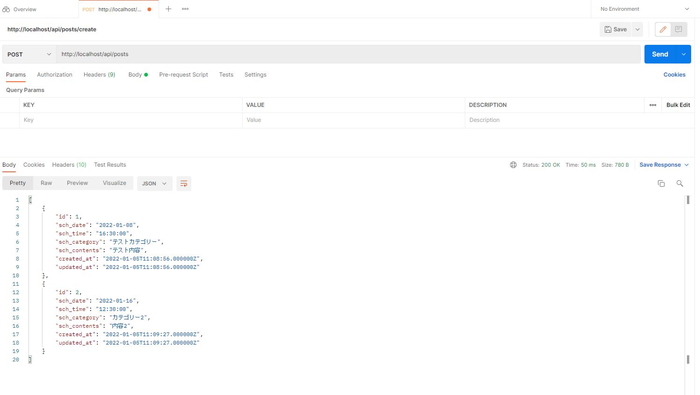
ブラウザ上でちゃんとデータが取得できることが分かりましたね。
あとはこのデータを表示するようにReactを調節するだけです。
スケジュールを表示しよう!
さて、それではExample.jsを編集していきましょう。
まずは1行目付近のimport周りを修正します。
|
1 2 3 |
import React,{Fragment,useState,useEffect} from 'react'; //追加 import ReactDOM from 'react-dom'; import axios from 'axios'; //追加 |
続いて、「onClick = n => ()」の下あたりにスケジュール追加のロジックを追加します。
|
1 2 3 4 5 6 7 8 9 10 11 12 13 14 15 16 17 18 19 20 21 22 23 24 25 26 27 28 29 30 31 32 33 |
//スケジュールのデータ const [schedules,setSche] = useState([]) //画面読み込み時に、1度だけ起動 useEffect(()=>{ getPostData(); },[]) //バックエンドからデータ一覧を取得 const getPostData = () =>{ axios .post('/api/posts') .then(response=>{ setSche(response.data); //バックエンドからのデータをセット console.log(response.data); }).catch(()=>{ console.log('通信に失敗しました'); }); } //データ格納の空配列を作成 let rows = []; //スケジュールデータをrowに格納する schedules.map((post)=> rows.push({ sch_id:post.id, sch_category:post.sch_category, sch_contents:post.sch_contents, sch_date:post.sch_date, sch_time:post.sch_time }) ); |
バックエンドからデータを取得するのは、anxiosの役割です。
返ってきたデータは「setSche」で「schedules」に格納しています。
「schedules」はデータを格納した配列です。
そのためからの配列「rows」を準備して、その中にmap関数で「schedules」の中身を移しています。
この段階で画面表示を試してみましょう。
jsファイルを変更したので、以下のコマンドでビルドしてください。
|
1 |
sail npm run dev |
画面を表示して、F12で開発ツールを起動しましょう。
コンソールのところで、データが取得しているのを確認できればOKです。

ちゃんと取得できていますね。
あとは配列「rows」の中身をカレンダー上に表示するだけです。
こちらも「Example.js」ファイルを編集します。
|
1 2 3 4 5 6 7 8 9 10 11 |
<div> <div> {day > last ? day - last : day <= 0 ? prevlast + day : day} </div> <div className="schedule-area"> {rows.map((schedule,k) => ( schedule.sch_date == year + '-' + zeroPadding(month) + '-' + zeroPadding(day) && <div className='schedule-title' key={k} id={schedule.sch_id}>{schedule.sch_contents}</div> ))} </div> </div> |
上部分のdayのところはカレンダーの日付の表示部分ですね。
前回はその下にschedule-areaを作りましたが、その中は空でした。
今回はその中にスケジュールを表示する処理を追加しています。
全部のスケジュールを確認し、年度、月、日付が同じならば表示するという簡単なものです。
ただし、monthとdayはデータベースの表記通り、0埋めをする必要があります。
そのために、最後に「createCalendear」関数の下に「zeroPadding」という関数を作成します。
|
1 2 3 |
function zeroPadding(num){ return ('0' + num).slice(-2); } |
これでビルドをすればスケジュールの内容が正しく表示されるはずです。
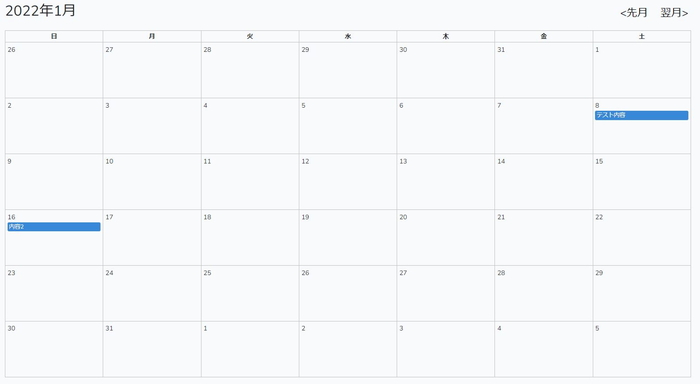
無事スケジュールが表示されましたね。
ここまで実装で来たら、SourceTreeでコミットしておきましょう。
さて、今回はここまで。次はスケジュールの登録機能を実装していきましょう。
ここまでのExample.jsのソースを下の折り畳みの中に記載しておきますね。
- クリックでExample.jsの全ソース表示
-
123456789101112131415161718192021222324252627282930313233343536373839404142434445464748495051525354555657585960616263646566676869707172737475767778798081828384858687888990919293949596979899100101102103104105106107108109110111112113114115116117118119120import React,{Fragment,useState,useEffect} from 'react';import ReactDOM from 'react-dom';import axios from 'axios';function Example(){const [year,setYear] = useState(new Date().getFullYear())const [month,setMonth] = useState(new Date().getMonth()+1)const last = new Date(year,month,0).getDate()const prevlast = new Date(year,month-1,0).getDate()const calendar = createCalendear(year,month)const onClick = n => () => {const nextMonth = month + nif (12 < nextMonth) {setMonth(1)setYear(year + 1)} else if (nextMonth < 1) {setMonth(12)setYear(year - 1)} else {setMonth(nextMonth)}}//スケジュールのデータconst [schedules,setSche] = useState([])//画面読み込み時に、1度だけ起動useEffect(()=>{getPostData();},[])//バックエンドからデータ一覧を取得const getPostData = () =>{axios.post('/api/posts').then(response=>{setSche(response.data); //バックエンドからのデータをセットconsole.log(response.data);}).catch(()=>{console.log('通信に失敗しました');});}//データ格納の空配列を作成let rows = [];//スケジュールデータをrowに格納するschedules.map((post)=>rows.push({sch_id:post.id,sch_category:post.sch_category,sch_contents:post.sch_contents,sch_date:post.sch_date,sch_time:post.sch_time}));return (<Fragment><div className="calender-header"><h1>{`${year}年${month}月`}</h1><div className="calender-nav"><button onClick={onClick(-1)}>{'<先月'}</button><button onClick={onClick(1)}>{'翌月>'}</button></div></div><table className="calender-table"><thead><tr><th>日</th><th>月</th><th>火</th><th>水</th><th>木</th><th>金</th><th>土</th></tr></thead><tbody>{calendar.map((week,i) => (<tr key={week.join('')}>{week.map((day,j) => (<td key={`${i}${j}`} id={day} ><div><div>{day > last ? day - last : day <= 0 ? prevlast + day : day}</div><div className="schedule-area">{rows.map((schedule,k) => (schedule.sch_date == year + '-' + zeroPadding(month) + '-' + zeroPadding(day) &&<div className='schedule-title' key={k}>{schedule.sch_contents}</div>))}</div></div></td>))}</tr>))}</tbody></table></Fragment>);}function createCalendear(year,month){const first = new Date(year,month - 1,1).getDay()return [0,1,2,3,4,5].map((weekIndex) => {return [0,1,2,3,4,5,6].map((dayIndex) => {const day = dayIndex + 1 + weekIndex * 7return day - first})})}function zeroPadding(num){return ('0' + num).slice(-2);}export default Example;if (document.getElementById('app')) {ReactDOM.render(<Example />, document.getElementById('app'));}
| Laravel×Reactでつくるスケジュールアプリ | |
| 環境構築 | Git、Reactの導入 |
| カレンダー表示 | スケジュール表示 |
| スケジュール登録 | スケジュール更新 |
| スケジュール削除 | 関数化Ⅰ |
| 関数化Ⅱ | |